1つのPostgreSQLコンテナに複数のデータベースを作成して、複数のアプリケーションからアクセス可能にしてみる
docker-composeでPostgreSQLコンテナを立ち上げる。docker-compose.ymlの内容は次のような感じで、Ktorプロジェクトのルートディレクトリに作成する。
version: "3.7"
services:
  postgres:
    image: 'postgres:13'
    container_name: takagimeow-postgres
    restart: always
    environment:
      - POSTGRES_USER=takagimeow
      - POSTGRES_PASSWORD=takagimeow_pass
    ports:
      - '5432:5432'
    volumes:
      - postgresql-data-vol:/var/lib/postgresql/data:rw
      - ./postgres-init:/docker-entrypoint-initdb.d

volumes:
  postgresql-data-vol:
複数のデータベースを1つのコンテナに対して作成するにあたって、volumesに./postgres-init:/docker-entrypoint-initdb.dを指定している。これにより同じ階層にあるpostgres-initディレクトリにコンテナの初回起動時に実行して欲しいsqlファイルを配置することができる。
CREATE DATABASE serverside;
CREATE DATABASE clientside;
コンテナを立ち上げる。
docker-compose up -d
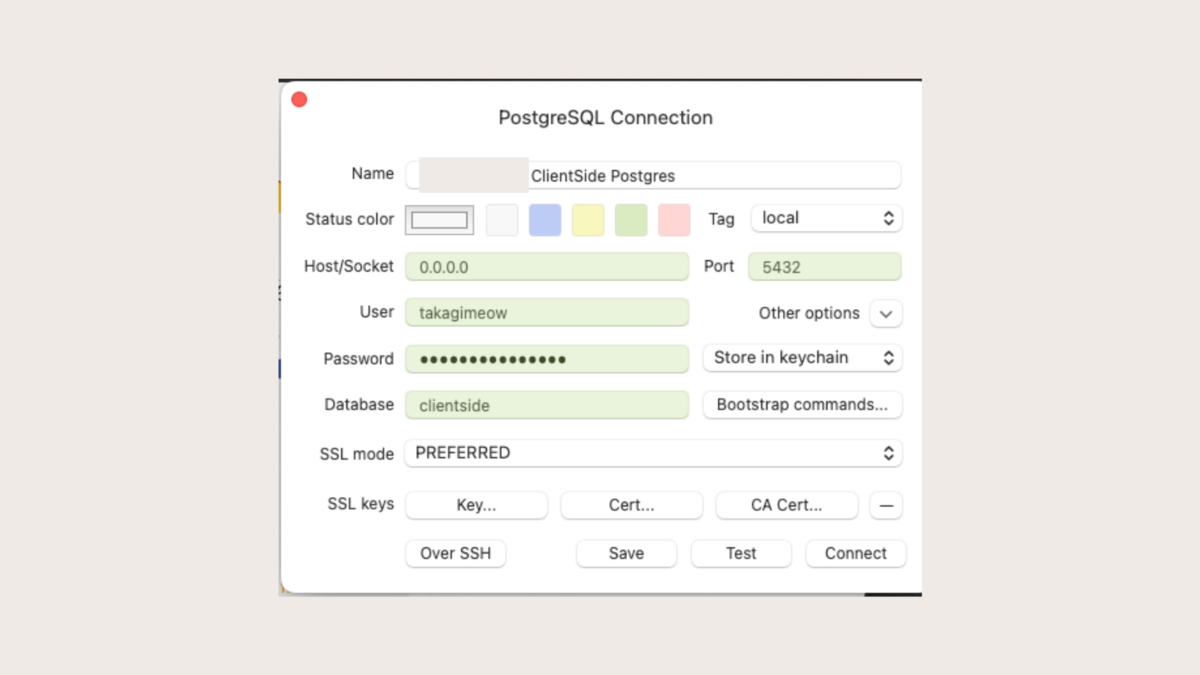
TablePlusを使って接続のテストを行ってみる。
まずはclientsideデータベースに対して。
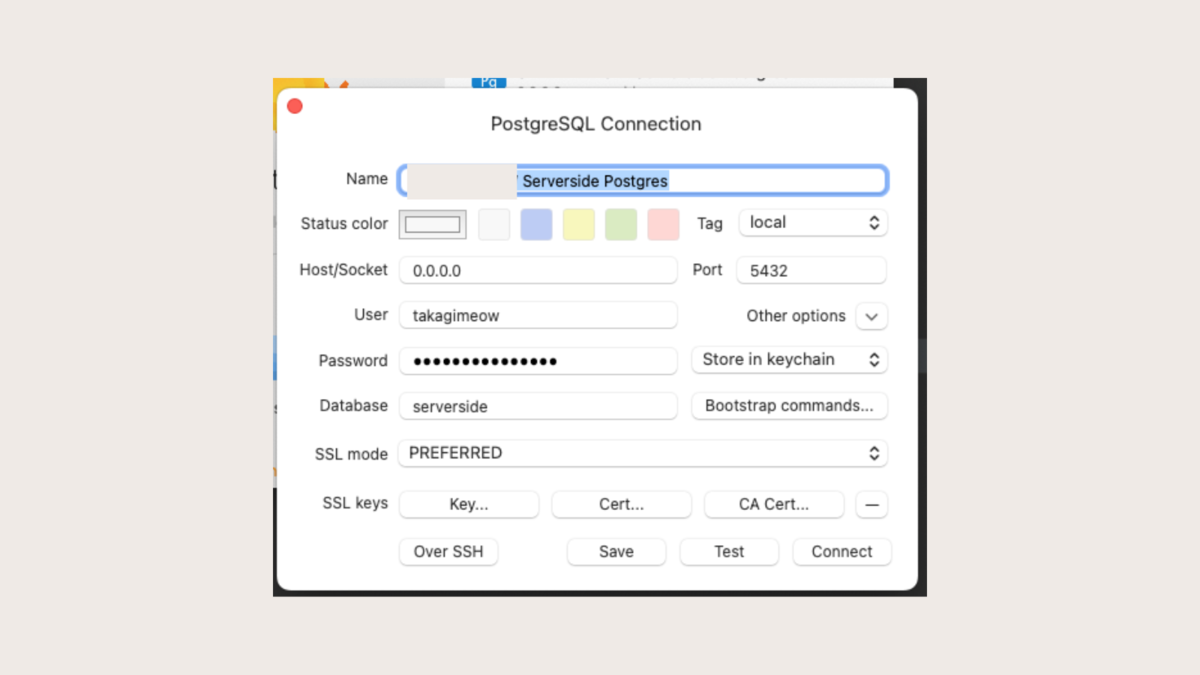
次はserversideデータベースに対して。
ExposedとPostgreSQLのJDBCドライバを使って接続を行う
gradle.propertiesにて、exposed_versionとpostgresql_versionを定義する。
exposed_version = 0.36.2
postgresql_version = 42.5.0
build.gradleにてPostgreSQLへの接続に必要な依存関係を追加する。
val exposed_version: String by project
val postgresql_version: String by project
...
dependencies {
    implementation("org.jetbrains.exposed:exposed-core:$exposed_version")
    implementation("org.jetbrains.exposed:exposed-dao:$exposed_version")
    implementation("org.jetbrains.exposed:exposed-jdbc:$exposed_version")
    implementation("org.postgresql:postgresql:$postgresql_version")
}
DatabaseFactoryを定義する。
object DatabaseFactory {
    fun init() {
        val driverClassName = "org.postgresql.Driver"
        val jdbcURL = "jdbc:postgresql://localhost:5432/serverside"
        val user = "takagimeow"
        val password = "takagimeow_pass"
        val database = Database.connect(
            url = jdbcURL,
            driver = driverClassName,
            user = user,
            password = password
        )
        transaction(database) {
            SchemaUtils.create(Users)
        }
    }

    suspend fun <T> dbQuery(block: suspend () -> T): T =
        newSuspendedTransaction(Dispatchers.IO) { block() }
}
ExposedのDSL APIでusersテーブルを定義する。
object Users : Table() {
    val id = integer("id").autoIncrement()
    val email = varchar("email", 128)
    val password = varchar("password", 128)
    val name = varchar("name", 128)
    val roleType = varchar("role_type", 128)

    override val primaryKey = PrimaryKey(id)
}
Application.module拡張メソッドの先頭で、DatabaseFactory.init()を呼び出す。これにより、データベースへの接続を可能にしておく。
fun Application.module() {
    DatabaseFactory.init()

    configureKoin()
    configureSerialization()
    configureMonitoring()
    configureHTTP()
    configureSecurity()
    configureRouting()
}
Ktorアプリケーションを起動後、TablePlusを使ってserversideデータベースの中身を確認してみる。usersテーブルが作成されているのがわかる。

Prismaを使ってclientsideデータベースに接続を行う
schema.prismaは次のようする。こちらはRemix Blues Stackで使われているschema.prismaと同じ内容になっているので、試したい方はぜひRemix Blues Stackを使ってプロジェクトを作成してみてほしい。
datasource db {
  provider = "postgresql"
  url      = env("DATABASE_URL")
}

generator client {
  provider = "prisma-client-js"
}

model User {
  id    String @id @default(cuid())
  email String @unique

  createdAt DateTime @default(now())
  updatedAt DateTime @updatedAt

  password Password?
  notes    Note[]
}

model Password {
  hash String

  user   User   @relation(fields: [userId], references: [id], onDelete: Cascade, onUpdate: Cascade)
  userId String @unique
}

model Note {
  id    String @id @default(cuid())
  title String
  body  String

  createdAt DateTime @default(now())
  updatedAt DateTime @updatedAt

  user   User   @relation(fields: [userId], references: [id], onDelete: Cascade, onUpdate: Cascade)
  userId String
}
.envを設定する。
DATABASE_URL="postgresql://takagimeow:takagimeow_pass@localhost:5432/clientside"
定義したスキーマをデータベースに反映させる。
npx prisma db push
clientsideデータベースの中身を確認してみる。スキーマで定義されているテーブルが作成されていることが確認できる。

参考
https://ysuzuki19.github.io/post/docker-mysql-postgres-multiple-databases