vitestとfirebase-functions-testを使ってテストを実行したら"__vite_ssr_import_1__ is not a function"と表示された場合の対処法
Firebase FunctionsのプロジェクトにJestの代わりにVitestを入れてみた。
yarn add -D vitest vite-tsconfig-paths
vitest.config.tsは次の通りに作成した。
/// <reference types="vitest" />
/// <reference types="vite/client" />

import { defineConfig } from "vite";
import tsconfigPaths from "vite-tsconfig-paths";

export default defineConfig({
  plugins: [tsconfigPaths()],
  test: {
    globals: true,
    environment: "node",
    include: ["./src/**/*.{test,spec}.{js,mjs,cjs,ts,mts,cts,jsx,tsx}"],
  },
});
そしてFirebase Functionsのテストなので、firebaes-functions-testも入れた。
yarn add -D firebase-functions-test
そしてテストを書いてテストを実行しようとしたら次のエラーが発生した。
TypeError: __vite_ssr_import_1__ is not a function
 ❯ src/routes/tab-one/activities/getActivities.test.ts:12:17
     10|
     11| beforeAll(async () => {
     12|   const {wrap} = firebaseFunctionsTest();
       |                 ^
     13|   // テスト対象の関数をラップする
     14|   wrapped = wrap(firebaseFunctions.https.onCall(getActivities));
deps.externalに['fibase-functions-test']を指定したり、deps.interopDefaultにtrueを設定しても解決しなかった。
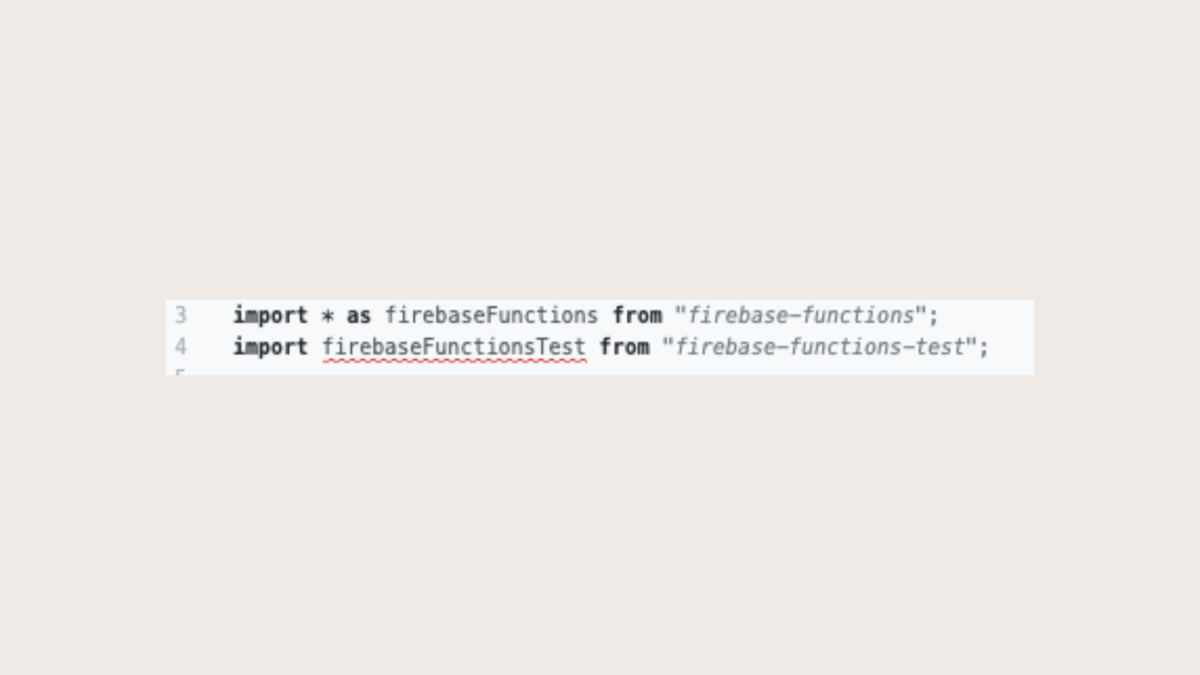
これは本来ならimport firebaseFunctionsTest from "firebase-functions-test";と書くべきところをimport * as firebaseFunctionsTest from "firebase-functions-test";と書いてしまっていたことが原因だったことが試しているうちにわかった。
firebase-functions-testをvitestで使用する場合はimport firebaseFunctionsTest from "firebase-functions-test";と書くように気をつける。
VSCode上で赤線が出る場合のTips
import firebaseFunctionsTest from "firebase-functions-test"と書くと下に赤線が表示されることがある。
このエラーの内容は次の通り。
This module is declared with using 'export =', and can only be used with a default import when using the 'esModuleInterop' flag.
なのでtsconfig.jsonに"esModuleIntrop": trueを追加する。
こうすることで赤線が消える。
// tsconfig.json
{
  "compilerOptions": {
    ...
    "types": ["vitest/globals"],
    "esModuleInterop": true,
  },
  ...
}
React Query Firebaseを使って React Nativeで Firebase Authを通して認証したりFirebase Functionsの関数を 呼び出してみよう
React Query Firebaseとは、Firebaseを使いやすくするためのHookのセットを提供してくれるパッケージです。提供されているHookでは、React Queryをラップしていて、React Queryの利点を融合することでフックをプロジェクトに対して簡単に導入できるようにしている。
TL;DR
今回作成したプロジェクトはこちらのリポジトリから見ることができる。
React Nativeプロジェクトの準備
React Nativeプロジェクトの作成方法やReact Queryの導入方法や簡単な使い方に関してはこちらの記事を参照してほしい。
Firebaseプロジェクトの準備
Firebaseプロジェクトの初期化方法などはこちらの記事を参照してほしい。
インストール
firebaseが導入されていることを確認する。導入されていない場合はインストールしておく。今回は最新バージョンの9を使用する。
yarn add firebase
React Query FirebaseではFirebaseで使いたい機能に合わせて、それらの機能に関するHookを提供するパッケージを個別にインストールする。
今回は@react-query-firebase/authと@react-query-firebase/functionsをインストールする。
yarn add @react-query-firebase/auth @react-query-firebase/functions
@tanstack/react-queryとreact-query問題
@tanstack/react-queryのQueryClientProviderを使用してReact Query FirebaseのuseAuthUserなどを使用すると、No QueryClient set, use QueryClientProvider to set oneというエラーが発生してしまうので、必ずreact-queryのQueryClientProviderを使用するようにする。
そして、必ず@4.0.0以上ではなく@3.39.2をインストールするようにする。これはreact-queryの型問題を解決するためである。@4.0.0以上だと型ファイルが見つからないので個別に型ファイルをインストールしようとするが、それでも型ファイルが見つからないとエラーが発生する。@types/react-queryのバージョンを下げると、今度はQueryClientProviderに赤線が表示されてしまう。これらの問題を解決するためにバージョン3の最後のバージョンである@3.39.2を指定する。
yarn add react-query@3.39.2
firebase.tsを作成する。
Firebaseのインスタンスを作成して、authやfunctionsのインスタンスをエクスポートするfirebase.tsファイルを作成する。
エミュレーターに接続するためには、個別にconnectAuthEmulator関数とconnectFunctionsEmulator関数を呼び出す。このとき、作成したauth変数とfunctions変数を渡す。
// helpers/firebase.ts

import "firebase/auth";
import "firebase/firestore";
import "firebase/functions";
import "firebase/storage";
import { initializeApp } from "firebase/app";
import Constants from "expo-constants";
import { connectAuthEmulator, getAuth } from "firebase/auth";
import { connectFunctionsEmulator, getFunctions } from "firebase/functions";

type Config = {
    apiKey: string | undefined;
    authDomain: string | undefined;
    databaseURL?: string | undefined;
    projectId: string | undefined;
    storageBucket: string | undefined;
    messagingSenderId: string | undefined;
    appId: string | undefined;
    measurementId: string | undefined;
};

const config: Config = {
    apiKey: Constants.manifest?.extra?.firebase.apiKey,
    authDomain: Constants.manifest?.extra?.firebase.authDomain,
    projectId: Constants.manifest?.extra?.firebase.projectId,
    storageBucket: Constants.manifest?.extra?.firebase.storageBucket,
    messagingSenderId: Constants.manifest?.extra?.firebase.messagingSenderId,
    appId: Constants.manifest?.extra?.firebase.appId,
    measurementId: Constants.manifest?.extra?.firebase.measurementId
};

const firebase = initializeApp({
    projectId: config.projectId,
    apiKey: config.apiKey,
    authDomain: config.authDomain,
    storageBucket: config.storageBucket
});

export const auth = getAuth(firebase);
connectAuthEmulator(auth, "http://localhost:9099");
export const functions = getFunctions(firebase);
connectFunctionsEmulator(functions, "localhost", 5001);
Firebaseの認証情報を取得するためにapp.config.jsを作成して、その中で環境変数からそれぞれの値を取得してConstants.manifest.extra.*で読み取れるようにconfig情報を更新して返すようにする。
// app.config.js

import dotenv from "dotenv";

dotenv.config();

export default ({ config }) => {
  const appConfig = {
    ...config,
    extra: {
      firebase: {
        apiKey: process.env.FIREBASE_API_KEY,
        authDomain: process.env.FIREBASE_AUTH_DOMAIN,
        databaseURL: process.env.FIREBASE_DATABASE_URL,
        projectId: process.env.FIREBASE_PROJECT_ID,
        storageBucket: process.env.FIREBASE_STORAGE_BUCKET,
        messagingSenderId: process.env.FIREBASE_MESSAGING_SENDER_ID,
        appId: process.env.FIREBASE_APP_ID,
        measurementId: process.env.FIREBASE_MEASUREMENT_ID,
        dynamicLinkDomain: process.env.FIREBASE_DYNAMIC_DOMAIN,
      },
    },
  };
  return appConfig;
};
ローカルで実行する場合は.envファイルを次のフォーマットで作成しておく。
# .env
FIREBASE_API_KEY=""
FIREBASE_AUTH_DOMAIN=""
FIREBASE_PROJECT_ID=""
FIREBASE_STORAGE_BUCKET=""
FIREBASE_MESSAGING_SENDER_ID=""
FIREBASE_APP_ID=""
FIREBASE_MEASUREMENT_ID=""
FIREBASE_DYNAMIC_DOMAIN=""
匿名ログインを行い、ユーザー情報を取得する
匿名ログインを行うにはuseAuthSignInAnonymouslyを使用する。第一引数にauthインスタンスを渡して、第二引数にオプションオブジェクトを渡す。
ドキュメントではmutation.mutateに何も渡さないで呼び出すようになっているが、実際に行うと型エラーが出てしまうので、emailとpasswordにから文字列を設定したオブジェクトを渡す。
import { auth } from "../helpers/firebase";
import {
  useAuthSignInAnonymously,
} from "@react-query-firebase/auth";

...

const mutation = useAuthSignInAnonymously(auth, {
  onSuccess(data, variables, context) {
    console.log("[onSuccess]: ", data);
  },
  onError(error, variables, context) {
    console.warn("[onError]: ", error);
  },
});

const handleSigninAnonymously = useCallback(() => {
  if (authQuery.isLoading || authQuery.isFetching || authQuery.data) {
    return () => {};
  }
  mutation.mutate({
    email: "",
    password: "",
  });
}, [authQuery]);

...

return (
  <Box px={3} py={3}>
    {!authQuery.data && authQuery.isFetched ? (
      <Button
        onPress={handleSigninAnonymously}
        isLoading={authQuery.isFetching || authQuery.isLoading}
      >
        {"匿名認証を行う"}
      </Button>
    ) : null}
  </Box>
)
onSuccessとonError
第二引数のオプションにonSuccessコールバック関数を渡すと、ログイン成功時に、指定した関数が呼び出される。
onErrorコールバック関数を渡した場合はログイン失敗時に、指定した関数が呼び出される。
匿名アカウントを永久アカウントに変換する
ログイン済みの匿名アカウントを、ユーザーに新しいメールアドレスとパスワードを入力してもらうことで永久アカウントに変換することができる。
これを行うにはuseAuthLinkWithCredentialを使用する。
今回は事前に準備したメールアドレスとパスワードを使用する。
mutation.mutateにはオブジェクトを渡す。userフィールドにはUser型のデータを渡す。これを取得するにはuseAuthUserを使用する。
credentialはFirebaseのEmailAuthProviderを利用して、入力されたメールアドレスとパスワードを渡して取得する。
import {
  Box,
  Button,
} from "native-base";
import { auth } from "../helpers/firebase";
import {
  useAuthUser,
  useAuthLinkWithCredential,
} from "@react-query-firebase/auth";

...

const authQuery = useAuthUser(["user"], auth);
const { mutate: linkWithCredential } = useAuthLinkWithCredential();

...

useEffect(() => {
    console.log("[authQuery.data]: ", authQuery.data);
}, [authQuery]);

const handleSigninWithEmailAndPassword = useCallback(() => {
  if (!authQuery.data) {
    return;
  }
  const email = "example@example.com";
  const password = "password";
  const credential = EmailAuthProvider.credential(email, password);
  linkWithCredential({
    user: authQuery.data,
    credential,
  });
}, [authQuery]);

...


return (
  <Box px={3} py={3}>
    {authQuery.data && authQuery.data.isAnonymous ? (
      <Button
        bg={authQuery.data?.isAnonymous ? "cyan.500" : "dark.500"}
        onPress={handleSigninWithEmailAndPassword}
        isLoading={authQuery.isFetching || authQuery.isLoading}
        disabled={!authQuery.data?.isAnonymous}
      >
        {"匿名アカウントから変更する"}
      </Button>
    ) : null}
    {authQuery.data && !authQuery.data.isAnonymous ? (
      <Text>{authQuery.data.email}</Text>
    ) : null}
  </Box>
);
...
永久アカウントへの返還に成功するとuseAuthUserから返される値が変更されるので、これを利用していろいろな機能を実装できる。
このとき、useEffectやuseCallbackの第二引数に[authQuery.data]ではなく、[authQuery]を渡すことに注意する。
Firebase Functionsを呼び出して、取得した結果を表示する
Firebase Functionsで定義した呼び出し可能関数を呼び出したい場合はuseFunctionsQueryを使用する。
第一引数にはクエリーキーを渡す。
第二引数にはFunctionsインスタンスを渡す。
第三引数には呼び出した呼び出し可能関数の名前を指定する。
第四引数には、もし呼び出し可能関数リクエストボディを必要とする場合はそれに対応するオブジェクトを渡す。
最初の型引数として、呼び出し可能関数が求めるリクエストボディの型を指定できる。これはRequestData型として定義する。
第二の型引数として呼び出し可能関数が返すレスポンスの型を指定できる。これはResponseBody型として定義する。
import {
  Text,
  Box,
  FlatList,
  VStack,
  HStack,
  Image,
  Spacer,
  Heading,
  Button,
} from "native-base";import { functions } from "../helpers/firebase";

...

type RequestData = {};
type ResponseData = {
  [key: string]: {
    id: string;
    label: string;
    date: string;
    value: number;
    method: string;
    exp: number;
    createdAt: string;
    icon: string;
  }[];
};

...

const functionsQuery = useFunctionsQuery<RequestData, ResponseData>(
  ["getActivities"],
  functions,
  "getActivities",
  {}
);

...
return (
  <FlatList
    contentContainerStyle={{
      paddingHorizontal: 12,
      paddingVertical: 12,
    }}
    h="1/2"
    showsVerticalScrollIndicator={false}
    showsHorizontalScrollIndicator={false}
    backgroundColor={"dark.800"}
    data={functionsQuery.data?.["2022-07-15"] ?? []}
    renderItem={({ item }) => {
      const { icon, date, label, value, createdAt, method, exp } = item;
      return (
        <>
          <VStack w="full" borderRadius={10} bg={"white"} px={3} py={3}>
            <HStack mb={3}>
              <Image
                source={{
                  uri: icon,
                }}
                alt="Alternate Text"
                size="sm"
                borderRadius={10}
              />
              <VStack px={3}>
                <Text fontWeight={date === "今日" ? "bold" : "normal"}>
                  {date}
                </Text>
                <Text color="dark.400">{label}</Text>
              </VStack>
            </HStack>
            <HStack>
              <VStack>
                <Text fontWeight={"bold"} fontSize={"lg"}>
                  {value}
                </Text>
                <Text color="dark.500">
                  {method === "COUNT" ? "回" : "時間"}
                </Text>
              </VStack>
              <Spacer />
              <VStack>
                <Text fontWeight={"bold"} fontSize={"lg"}>
                  {exp}
                </Text>
                <Text color="dark.500">経験値</Text>
              </VStack>
              <Spacer />
              <VStack>
                <Text fontWeight={"bold"} fontSize={"lg"}>
                  {createdAt}
                </Text>
                <Text color="dark.500">スケジュール</Text>
              </VStack>
            </HStack>
          </VStack>
          <Box mb={3} />
        </>
      );
    }}
  />
);
useFunctionsQueryとuseFunctionsCallの違い
useFunctionsQueryを使用した場合はコンポーネントのレンダリング時に指定したCallable Functionが呼び出される。
もし、任意のタイミングでオンデマンドにCallable Functionを呼び出したい場合はuseFunctionsCallを利用する。
Firebase エミュレーターを立ち上げる。
作成済みのプロジェクトをFirebase CLIで選択する。
firebase projects:list
firebase use project-name
Firebaseエミュレーターの初期化を行う。 今回はAuthenticationとFunctionsを選択する。
firebase init emulators
ルートディレクトリのfirebase.jsonにemulatorsフィールドが作成される。
// firebase.json
{
  "functions": {
    ...
  },
  "emulators": {
    "auth": {
      "port": 9099
    },
    "functions": {
      "port": 5001
    },
    "ui": {
      "enabled": true
    }
  }
}
そしてエミュレーターを起動する。
firebase emulators start
アプリを起動する
アプリを起動する。
yarn start
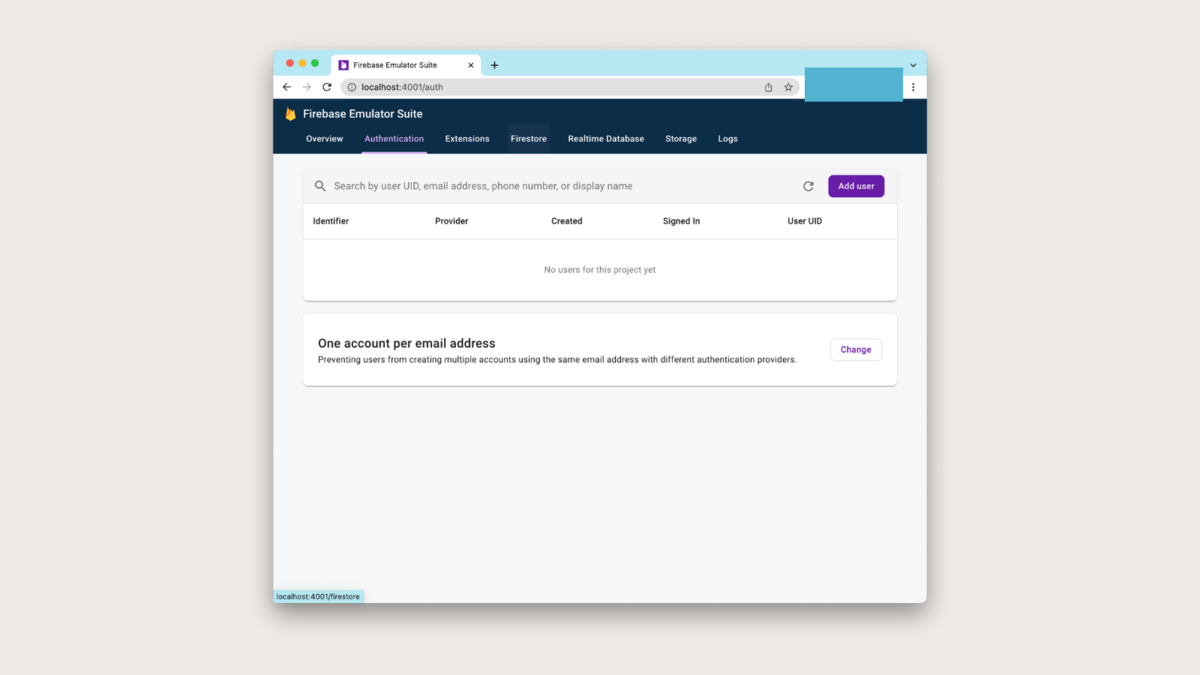
呼び出し可能関数の結果が表示されていて、匿名認証を行うと書かれたボタンが表示されている。

このときは、まだユーザーは作成されていない。
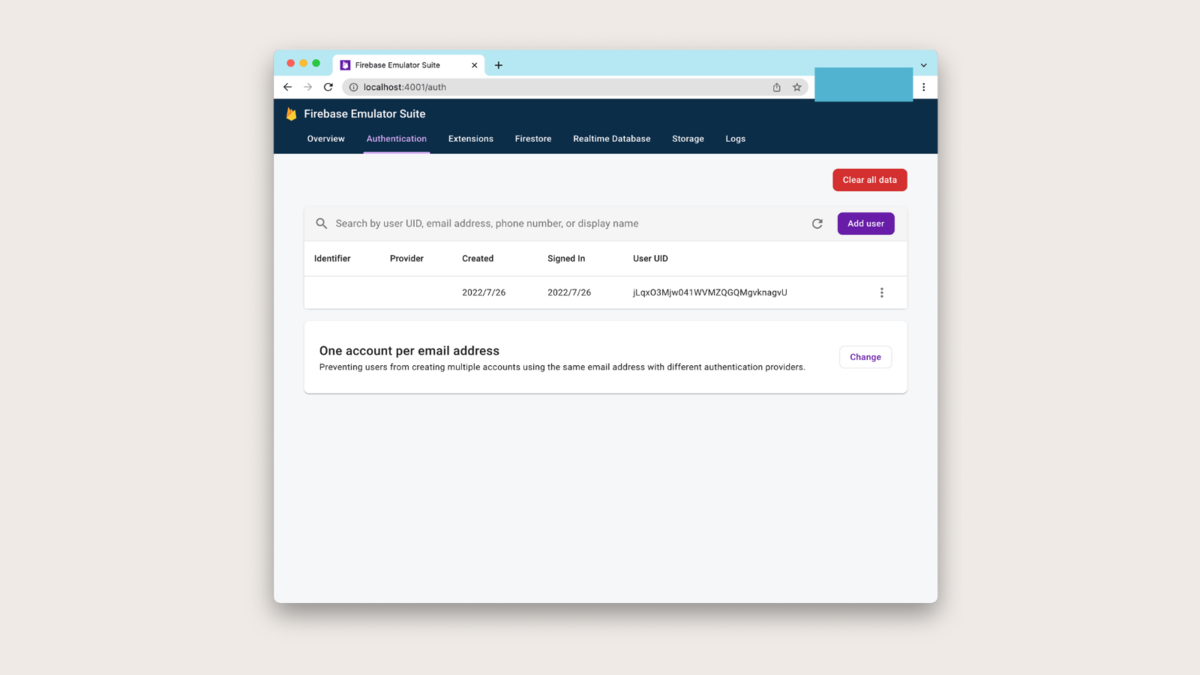
ボタンをタップして匿名認証を行う。するとボタンの内容が変更される。

そして、匿名アカウントが作成されている。
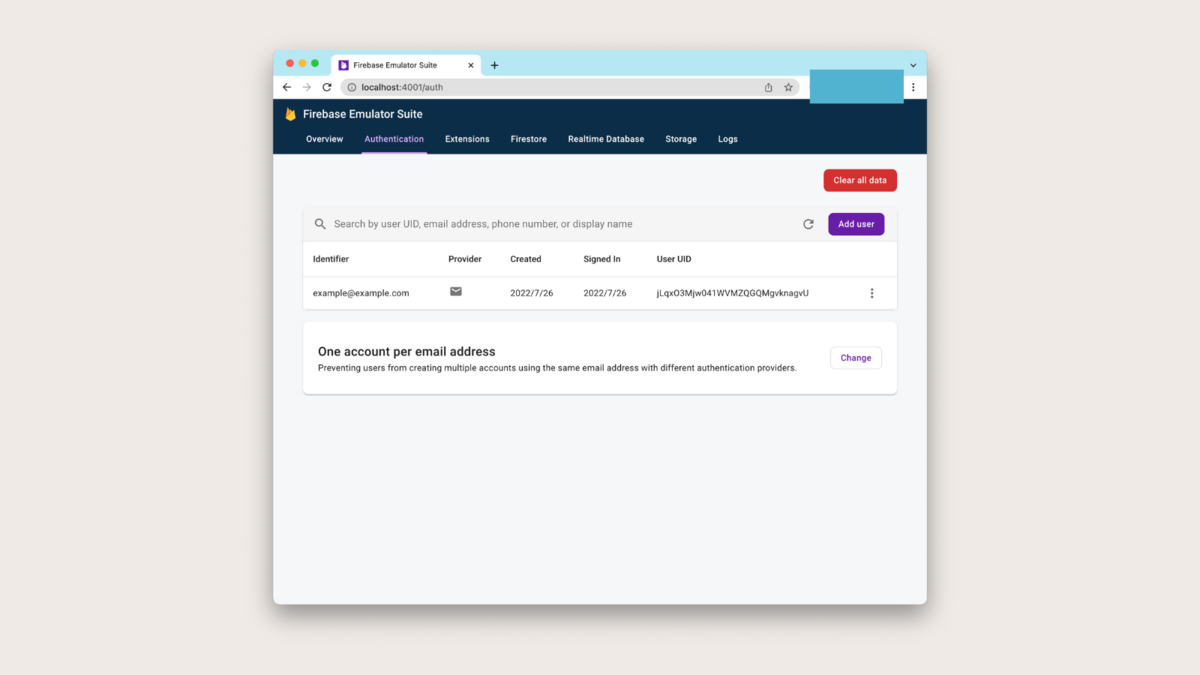
次に、匿名アカウントを永久化する。
メールアドレスが表示されれば成功。

そして、先ほどまで空欄だったIdentifierカラムにexample@example.comが設定されていて、Providerカラムにメールアイコンが表示されている。
"Generating a new Keystore is not supported in --non-interactive mode"というエラーが出た場合の対処法
いつものようにGitHub Actions上で、EAS Buildを実行していたところ次のようなエラーが発生した。
✔ Using remote Android credentials (Expo server)
    Error: Generating a new Keystore is not supported in --non-interactive
    mode
解決方法として、Android (Classic)のCredentialsをAndroid (EAS)のCredentialsにコピーすることで解決するものが存在する。
詳しくはこちらを参照。
ただ、自分の場合にはそのタブが表示さなかったのと、previewプロフィールにAPP_VARIANT環境変数を設定してビルド時にandroid.packageの値を変更していたという特別な理由もあるため、GitHub Actions上から--no-interactiveをつけてビルドを行わず、ローカルでビルドを行った。
npm install -g eas-cli expo-cli
eas build --platform=android --profile=preview
無事ビルドできるようになった。
React NativeでFirebaseを使おうとする際に'While trying to resolve module `idb` from file...'というエラーが出る場合の対処法
Expo CLIを使用して作成したReact NativeプロジェクトでFirebaseを導入してアプリを立ち上げた際に次のようなエラーが発生した。
While trying to resolve module `idb` from file `/プロジェクトのパス/node_modules/@firebase/app/dist/esm/index.esm2017.js`, the package `/プロジェクトのパス/node_modules/idb/package.json` was successfully found. However, this package itself specifies a `main` module field that could not be resolved (`/プロジェクトのパス/node_modules/idb/build/index.cjs`. Indeed, none of these files exist:
StackOverflowに解決策が記載されていた。
端的に言うと、Firebaseのパッケージでは.cjsという拡張子が使われているが、ExpoやReact Nativeではこの拡張子のファイルがサポートされていないためこのような問題が発生しているらしい。
なので、ルートディレクトリにmetro.config.jsファイルを作成して、手動で.cjsをパースする設定を追加する必要がある。
// metro.config.js

const { getDefaultConfig } = require("@expo/metro-config");

const defaultConfig = getDefaultConfig(__dirname);

defaultConfig.resolver.assetExts.push("cjs");

module.exports = defaultConfig;
これで解決した。
Firebaseプロジェクトの作り方
Firebaseのプロジェクトをセットアップする
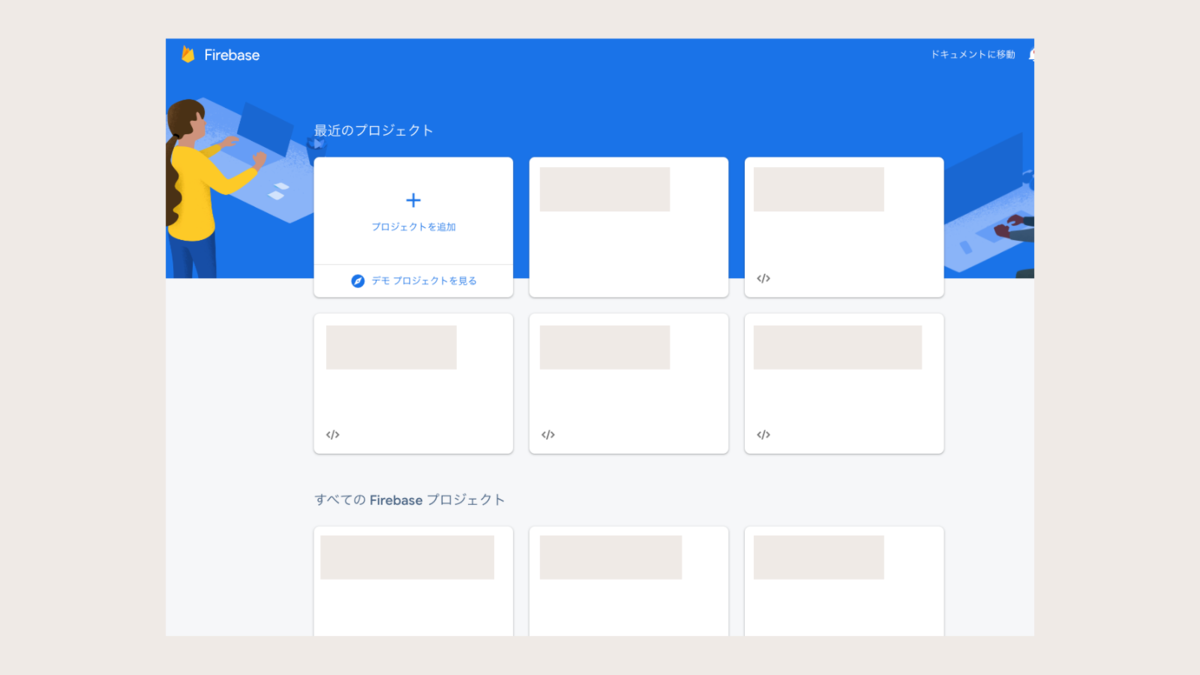
まずはコンソール上でFirebaseのセットアップを行う。
プロジェクトを追加をクリックする
プロジェクト名を入力する

今回は「このプロジェクトでGoogle Analyticsを有効にする」をONにして「続行」をクリックする。

アナリティクスを既存のアカウントから選択するか新しく作成する。 そして地域を「日本」に選択して、「続行」をクリックする。

プロジェクトの作成が完了したら「続行」をクリックする。

Authenticationのページに移動して、「メール/パスワード」を選択する。
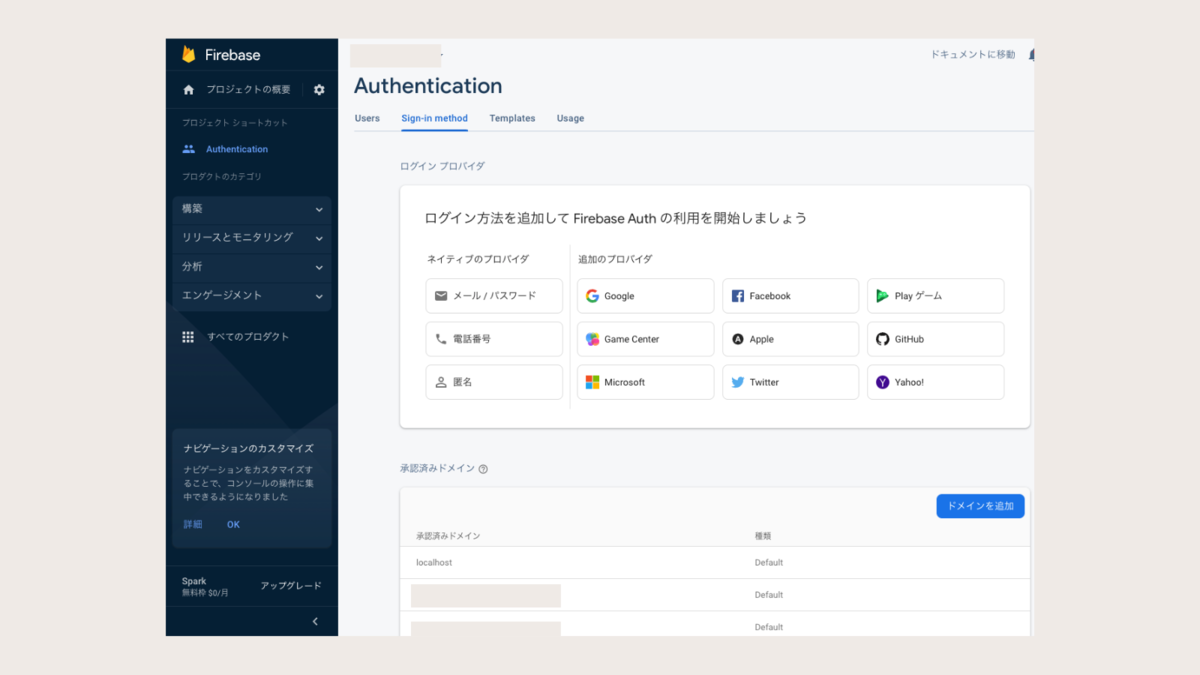
「メール/パスワード」を有効に設定して、「保存」をクリックする。

プロジェクトの設定ページに移動して、ウェブアプリを追加する。 アプリのニックネームを入力して、「アプリを登録」をクリックする。

保存が完了したら、表示されているfirebaseConfigの内容をメモしておく。
// Import the functions you need from the SDKs you need
import { initializeApp } from "firebase/app";
import { getAnalytics } from "firebase/analytics";
// TODO: Add SDKs for Firebase products that you want to use
// https://firebase.google.com/docs/web/setup#available-libraries

// Your web app's Firebase configuration
// For Firebase JS SDK v7.20.0 and later, measurementId is optional
const firebaseConfig = {
  apiKey: "...",
  authDomain: "...",
  projectId: "...",
  storageBucket: "...",
  messagingSenderId: "...",
  appId: "...",
  measurementId: "..."
};

// Initialize Firebase
const app = initializeApp(firebaseConfig);
const analytics = getAnalytics(app);
ローカルでFirebaseのプロジェクトディレクトリを初期化する
Firebase CLIをインストールする。
npm install -g firebase-tools
Firebase CLIを使ってログインする。開かれたページの内容に従って進める。
firebase login
ログインが正しく成功したかを確認するため、ログインしたアカウントで作成したFirebaseプロジェクトの一覧を表示する。
firebase projects:list
プロジェクトを初期化する。まずプロジェクト用のフォルダを作成する。フォルダ名は先ほど作成したプロジェクト名と一致させとておいた方が良い。
mkdir project-name
cd ./project-name
FunctionsとEmulatorsを選択して、エンターキーを押す。
firebase init


     ######## #### ########  ######## ########     ###     ######  ########
     ##        ##  ##     ## ##       ##     ##  ##   ##  ##       ##
     ######    ##  ########  ######   ########  #########  ######  ######
     ##        ##  ##    ##  ##       ##     ## ##     ##       ## ##
     ##       #### ##     ## ######## ########  ##     ##  ######  ########

You're about to initialize a Firebase project in this directory:

  /Users/username/firebase-lab

? Which Firebase features do you want to set up for this directory? Press Space to select features, then Enter to confirm your choices. (Press <space> to select, <a> to toggle all, <i> to invert selection, and <ent
er> to proceed)
❯◯ Realtime Database: Configure a security rules file for Realtime Database and (optionally) provision default instance
 ◯ Firestore: Configure security rules and indexes files for Firestore
 ◯ Functions: Configure a Cloud Functions directory and its files
 ◯ Hosting: Configure files for Firebase Hosting and (optionally) set up GitHub Action deploys
 ◯ Hosting: Set up GitHub Action deploys
 ◯ Storage: Configure a security rules file for Cloud Storage
 ◯ Emulators: Set up local emulators for Firebase products
Use an existing projectを選択して、先ほど作成したプロジェクトを選択する。
=== Project Setup

First, let's associate this project directory with a Firebase project.
You can create multiple project aliases by running firebase use --add,
but for now we'll just set up a default project.

? Please select an option: (Use arrow keys)
❯ Use an existing project
  Create a new project
  Add Firebase to an existing Google Cloud Platform project
  Don't set up a default project
TypeScriptを選択する。
=== Functions Setup

A functions directory will be created in your project with sample code
pre-configured. Functions can be deployed with firebase deploy.

? What language would you like to use to write Cloud Functions?
  JavaScript
❯ TypeScript
ESLintを自動セットアップしてもらうためにYを入力する。
? Do you want to use ESLint to catch probable bugs and enforce style? (Y/n)
npmを使用したい場合はyを入力する。yarnなどを使用したい場合はnを入力する。
✔  Wrote functions/package.json
✔  Wrote functions/.eslintrc.js
✔  Wrote functions/tsconfig.json
✔  Wrote functions/tsconfig.dev.json
✔  Wrote functions/src/index.ts
✔  Wrote functions/.gitignore
? Do you want to install dependencies with npm now? (Y/n)
Authentication EmulatorとFunctions Emulatorのみを選択する。必要な場合は他のエミュレーターも選択する。
=== Emulators Setup
? Which Firebase emulators do you want to set up? Press Space to select emulators, then Enter to confirm your choices. (Press <space> to select, <a> to toggle all, <i> to invert selection, and <enter> to proceed)
❯◯ Authentication Emulator
 ◯ Functions Emulator
 ◯ Firestore Emulator
 ◯ Database Emulator
 ◯ Hosting Emulator
 ◯ Pub/Sub Emulator
 ◯ Storage Emulator
それぞれのエミュレーターで使用するポート番号が聞かれるのでそのままエンターキーを押し続ける。
? Which port do you want to use for the auth emulator? (9099)
? Which port do you want to use for the functions emulator? 5001
? Would you like to enable the Emulator UI? (Y/n)
? Which port do you want to use for the Emulator UI (leave empty to use any available port)?
今すぐエミュレーターをダウンロードする場合はエンターキーを押す。
? Would you like to download the emulators now? (y/N)
✔ Firebase initialization complete!が表示されたセットアップ完了である。
i  Writing configuration info to firebase.json...
i  Writing project information to .firebaserc...
i  Writing gitignore file to .gitignore...

✔  Firebase initialization complete!
lsを実行して次のファイル群が表示されることを確認する。
$ ls
firebase.json   functions
Androidでインターネット接続の権限を追加する方法
AndroidManifest.xmlを開いて、<manifest>と<application>の間に<uses-permission android:name="android.permission.INTERNET" />を追加する。
<?xml version="1.0" encoding="utf-8"?>
<manifest xmlns:android="http://schemas.android.com/apk/res/android"
    package="com.example.myapplication">
    <uses-permission android:name="android.permission.INTERNET" />
    <application
        android:allowBackup="true"
        android:icon="@mipmap/ic_launcher"
        android:label="@string/app_name"
        android:roundIcon="@mipmap/ic_launcher_round"
        android:supportsRtl="true"
        android:theme="@style/Theme.MyApplication">
        <activity
            android:name=".MainActivity"
            android:exported="true">
            <intent-filter>
                <action android:name="android.intent.action.MAIN" />

                <category android:name="android.intent.category.LAUNCHER" />
            </intent-filter>
        </activity>
    </application>

</manifest>
React NativeでReact Queryを使ってみよう
React Native React Queryを使ってみようという話。ネタバレすると、今回はuseQueryのみで、useMutationなどは使わない。
TL;DR
今回のコードはこちらのリポジトリで全容を確認できる。
プロジェクトの準備
まずはプロジェクトを作成する。
expo init --template expo-template-blank-typescript
cd project-name
デザインをしやすくするためにNative Baseをインストールする。
yarn add native-base
expo install react-native-svg
ノッチやステータスバーなOSのインターフェース要素の周辺にコンポーネントを適切に配置するためにreact-native-safe-area-contextをインストールする。このパッケージはnative-baseが依存しているので必要。
expo install react-native-safe-area-context
React Queryをインストールする。
yarn add @tanstack/react-query
React Queryを使ってみる前に必要な作業を行なっていく。
App.tsx
まずは、App.tsxの中身を分離させてMain.tsxとHomeScreen.tsxを作成する。
App.tsxではReact Queryの<QueryClientProvider />やNative Baseの<NativeBaseProvider>などでMain.tsxのMainコンポーネントを囲むようにする。こうすることで、Mainコンポーネント内で囲んだプロバイダーのフックが使えるようになる利点がある。
// App.tsx

import { SafeAreaProvider } from "react-native-safe-area-context";
import {
  QueryClient,
  QueryClientProvider,
} from "@tanstack/react-query";
import Main from "./Main";

const queryClient = new QueryClient();

export default function App() {
  return (
    <QueryClientProvider client={queryClient}>
      <SafeAreaProvider>
        <Main />
      </SafeAreaProvider>
    </QueryClientProvider>
  );
}
QueryClient
queryClientはキャッシュされたデータとのコミニュケーションを行うために使用される。そして、基本的にはQueryClientProviderのclientプロパティに初期化したqueryClientを一度だけ渡す。
Main.tsx
今回は使っていないが、Main.tsxでは本来React Navigationのルートナビゲーターなどを配置するために使用する。今回はそのままHomeScreenコンポーネントを配置する。
// Main.tsx

import { StatusBar } from "expo-status-bar";
import { HomeScreen } from "./screens/HomeScreen";

export default function Main() {
  return (
    <>
      <HomeScreen />
      <StatusBar style="auto" />
    </>
  );
}
HomeScreen.tsx
では実際にReact Queryを使用するHomeScreenコンポーネントを作成していく。
import { useQuery } from "@tanstack/react-query";
import { useEffect } from "react";
import {
  Text,
  Box,
  FlatList,
  VStack,
  HStack,
  Image,
  Spacer,
  Heading,
} from "native-base";

const loader = () => {
  return {
    "2022-07-15": [
      {
        id: "activity-id-1",
        label: "腹筋ローラー",
        date: "2022/7/15",
        value: "20",
        method: "COUNT",
        exp: 100,
        createdAt: "14:25",
        icon: "https://wallpaperaccess.com/full/317501.jpg",
      },
      {
        id: "activity-id-2",
        label: "腹筋ローラー",
        date: "2022/7/15",
        value: "20",
        method: "COUNT",
        exp: 100,
        createdAt: "14:28",
        icon: "https://wallpaperaccess.com/full/317501.jpg",
      },
      {
        id: "activity-id-3",
        label: "腹筋ローラー",
        date: "2022/7/15",
        value: "01:00",
        method: "TIME",
        exp: 200,
        createdAt: "14:31",
        icon: "https://wallpaperaccess.com/full/317501.jpg",
      },
    ],
  };
};

export function HomeScreen() {
  const query = useQuery(["home_screen_loader"], loader);

  return (
    <Box flex={1} safeArea>
      <Box px={3} py={3}>
        <Heading>最近のアクティビティ</Heading>
      </Box>
      <FlatList
        contentContainerStyle={{
          paddingHorizontal: 12,
          paddingVertical: 12,
        }}
        h="1/2"
        showsVerticalScrollIndicator={false}
        showsHorizontalScrollIndicator={false}
        backgroundColor={"dark.800"}
        data={query.data?.["2022-07-15"] ?? []}
        renderItem={({ item }) => {
          const { icon, date, label, value, createdAt, method, exp } = item;
          return (
            <>
              <VStack w="full" borderRadius={10} bg={"white"} px={3} py={3}>
                <HStack mb={3}>
                  <Image
                    source={{
                      uri: icon,
                    }}
                    alt="Alternate Text"
                    size="sm"
                    borderRadius={10}
                  />
                  <VStack px={3}>
                    <Text fontWeight={date === "今日" ? "bold" : "normal"}>
                      {date}
                    </Text>
                    <Text color="dark.400">{label}</Text>
                  </VStack>
                </HStack>
                <HStack>
                  <VStack>
                    <Text fontWeight={"bold"} fontSize={"lg"}>
                      {value}
                    </Text>
                    <Text color="dark.500">
                      {method === "COUNT" ? "回" : "時間"}
                    </Text>
                  </VStack>
                  <Spacer />
                  <VStack>
                    <Text fontWeight={"bold"} fontSize={"lg"}>
                      {exp}
                    </Text>
                    <Text color="dark.500">経験値</Text>
                  </VStack>
                  <Spacer />
                  <VStack>
                    <Text fontWeight={"bold"} fontSize={"lg"}>
                      {createdAt}
                    </Text>
                    <Text color="dark.500">スケジュール</Text>
                  </VStack>
                </HStack>
              </VStack>
              <Box mb={3} />
            </>
          );
        }}
      />
    </Box>
  );
}
クエリーキー
useQueryを使用するとき、第一引数にはクエリーキーを指定する。クエリーキーは1つの文字列を含む配列のようなものから、多数の文字列を含んでいたりオブジェクトを含む配列でも可能です。クエリーキーとして認められる唯一の条件はシリアライズ可能であり、クエリーのデータに対してユニークであることです。
クエリー関数
React Queryがデータを要求するために使用される関数です。クエリー関数の第一引数にはQueryFunctionContextを受け取ります。
解決したデータを返すかエラーをスローするかして必ずプロミスを返さないといけない。undefinedを返すことは許されないので注意が必要。
実行してみる
アプリを起動するとこんな感じに表示される。

これだけだとReact Queryの恩恵がよくわからないかもしれないが、今回で言うとloader関数の部分でFirebase Functionsの呼び出しやREST APIの呼び出し等を行うことで、表示部分とデータの取得に関わる処理の分離がシンプルに実装できるのでコードの管理がとても楽になる。